Strawberry Jam Recipe Without Pectin
Using our homemade strawberry jam recipe was the great kickoff for summer vacation! One thing we love here about summer is going to the pick your own farm. It is an inexpensive day out and you get rewarded with a ton of berries and other delicious fruit. Last weekend we picked strawberries and boy did we pick strawberries! We came home with quite a bit, but hey it’s strawberries so it is ok. We also made a nice no bake strawberry dessert.
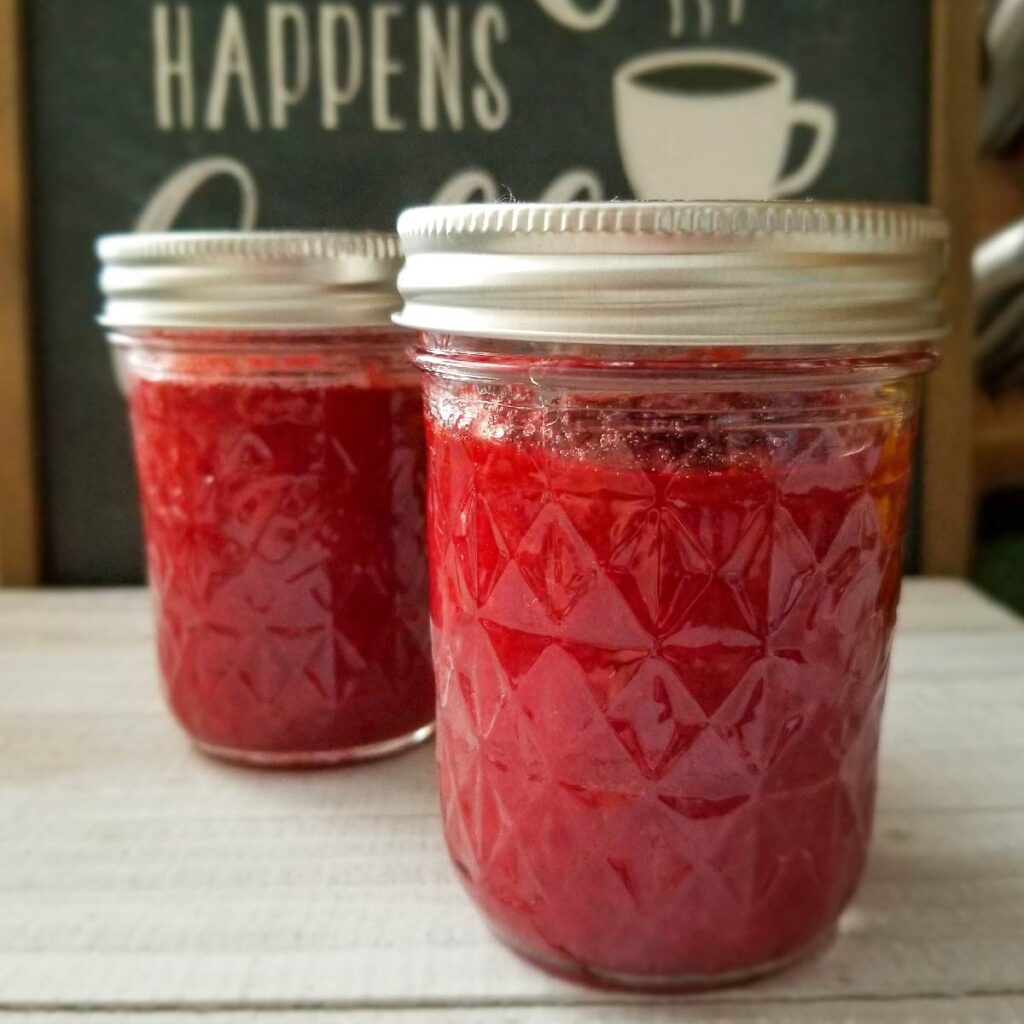
So what do you do with all these strawberries? Make this strawberry jam recipe, along with other things. We also made some strawberry shortcake and a dessert topping for a cheesecake. The dessert topping recipe is from Honest & Truly and her recipe is here – simple strawberry syrup recipe. It is similar to jam and really easy to make as well.
If you have never made jam before, it is very easy. Easier then one would imagine. I realized I was out of pectin and was busy so I tried it with lemon juice instead of pectin. It worked out great! This is not a super thick jam, it is perfectly spreadable without being too thick.
This recipe can be canned and we did that with 3 of the jars. 1 was left for eating now 🙂 If you can use up 4 half pint jars within about 3 weeks, it doesn’t have to be canned. We use less sugar then most recipes you will find. You really don’t need as much sugar as many people have you add and you will be amazed at the flavor!
I will be adding the canning instructions as well in case you are interested in canning your strawberry jam. Whether you are canning or not, be sure to heat your jars up before adding the jam. The jars handle the heat but not the temperature difference. Also be sure to use jars that are used for canning. They have the flat lid and the ring to lock the lid on.
We use affiliate links on our site. This post may contain affiliate links and we may earn a commission on qualifying purchases. Please see our affiliate disclosure for more details.
As a Note:
As mentioned above, this is a spreadable jam that is not as thick as some jams. If you prefer yours to be a little thicker, you will want to have a little bit of pectin on hand. You can add a tablespoon to it after the mix boils at a rolling boil. Continue to boil for a minute stirring constantly.
Making the Strawberry Jam Recipe
This jam is super easy, if you didn’t catch that before. It has 3 ingredients and that is it. It has strawberries, sugar and lemon juice. Simple, right?
Other Things You Will Need:
If not canning you can use a regular pot or a canning pot, if canning you need a large enough pot to fully submerge jars with a few inches above:
- Jars for canning
- Canning pot or large pot with a rack
- This is great but not required – canning starter kit (not an affiliate link, just a good deal at Walmart.)
or:
- a wide mouth funnel
- something to grab hot jars
- a measuring tool for how high jam is (all 3 of these included in the above starter kit)
Getting Started
Before you start, place your jars in a pot with water in it. Preferably with a rack placed in it (you will need a rack for canning) but if you don’t have one, it is ok for heating the jars without. Heat the water on medium to bring the temperature of the jars to a hot temp while making your jam.
Cut the stems off of your strawberries, cut them in half or even smaller and put the strawberries in a pot. I used a bigger pot then really needed because it gets hot and boils up a little. With a potato masher, mash the strawberries up a bit. You can also use a food processor if you rather. We like our jam slightly lumpy.
Add the sugar to the strawberries and let sit for about 5 minutes. Now add in the lemon juice – ordinarily I would say to use fresh in cooking recipes but for jams use bottled lemon juice like ReaLemon. Turn burner on to medium – low and cook for about 2 minutes. I like to continue to mash the strawberries a little here. They are warm and mixed with sugar so they tend to mash a little easier at this point.
Turn the heat up to high and bring it to a rolling boil, stirring very often. Here is a short video clip I made of the rolling boil:
After you have hit this rolling boil, cook for 4 minutes. Continue to stir very often. You will notice that it will start to thicken. Drop to medium and cook for about 2 minutes. Turn off the burner.
Pouring Into Jars
I let it sit for a minute and then use a ladle to pour the jam into the jars, leaving a half an inch from the top. A wide funnel works great here that is used for canning. I use a jar grabber to remove the jars from the water and use the wide funnel to pour the jam into the jars. Do this one at a time so the jars do not cool off before adding the jam.
If you do not have a grabber and are not canning (if you are canning you need the water to cover the jars), you can fill the pot about half way up the bottles with water to heat the jars like you see here. You can fill the jars while in the water if need be as well. Place the lids on and use a towel to remove and place on a towel on the counter. If not canning, allow to cool to room temperature and place in the refrigerator.
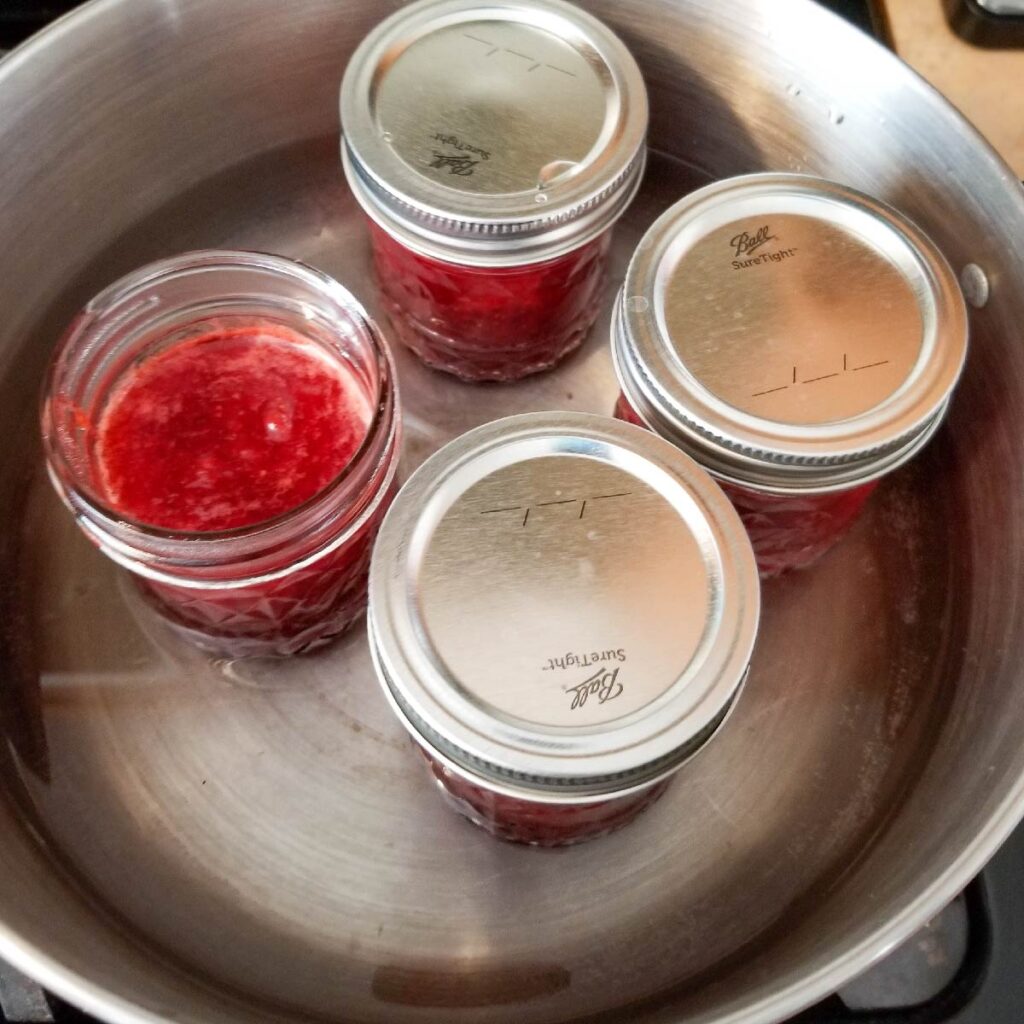
This strawberry jam recipe will keep well in the fridge if used within 2-3 weeks.
Canning the Jam
If you do not have all the stuff to can foods, you can still can this strawberry jam recipe. You will need a large stock pot, a rack of some sort that can be boiled at the bottom of the pan and some Ball jars with lids. You can use another brand, this is the only brand I know and use. But be sure they are for canning! Oh and you will need a way to get hot jars out of the water. It is best to use a jar grabber, but you could use a silicone glove that is heat resistant as well. Instructions for first time canners are below.
We have 2 big canning pots, but this one is good for this jam. The other I have is wider for more jars. This is what we would usually use:
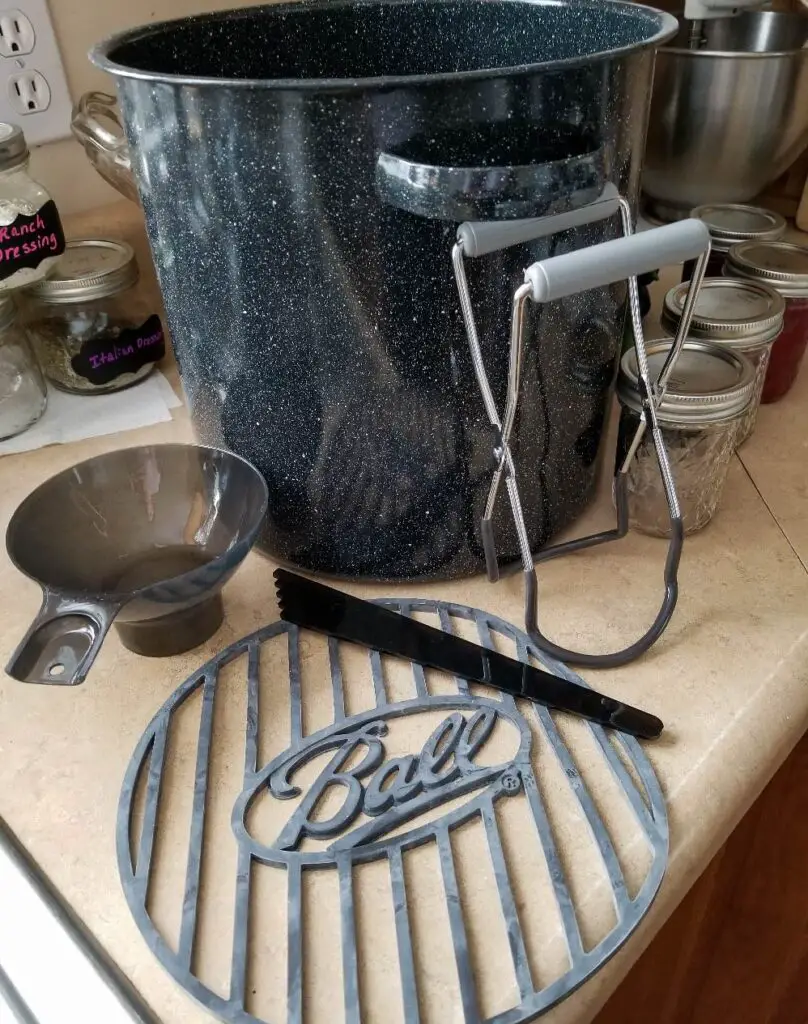
If you have all the equipment and know have done canning before, give a 10 minute water bath. Remove lid and let sit for about 10 minutes before removing from the water. Place on a kitchen towel, not directly on the counter. Within a few hours your jars should seal, but don’t check them until 24 hours later.
When You Don’t Have all the Equipment and are New to Canning
Tho we recommend using canning equipment, this is showing you how you can do it without. The water needs to cover jars completely, I just have it lower to demonstrate. Be sure to fill it above the jars!
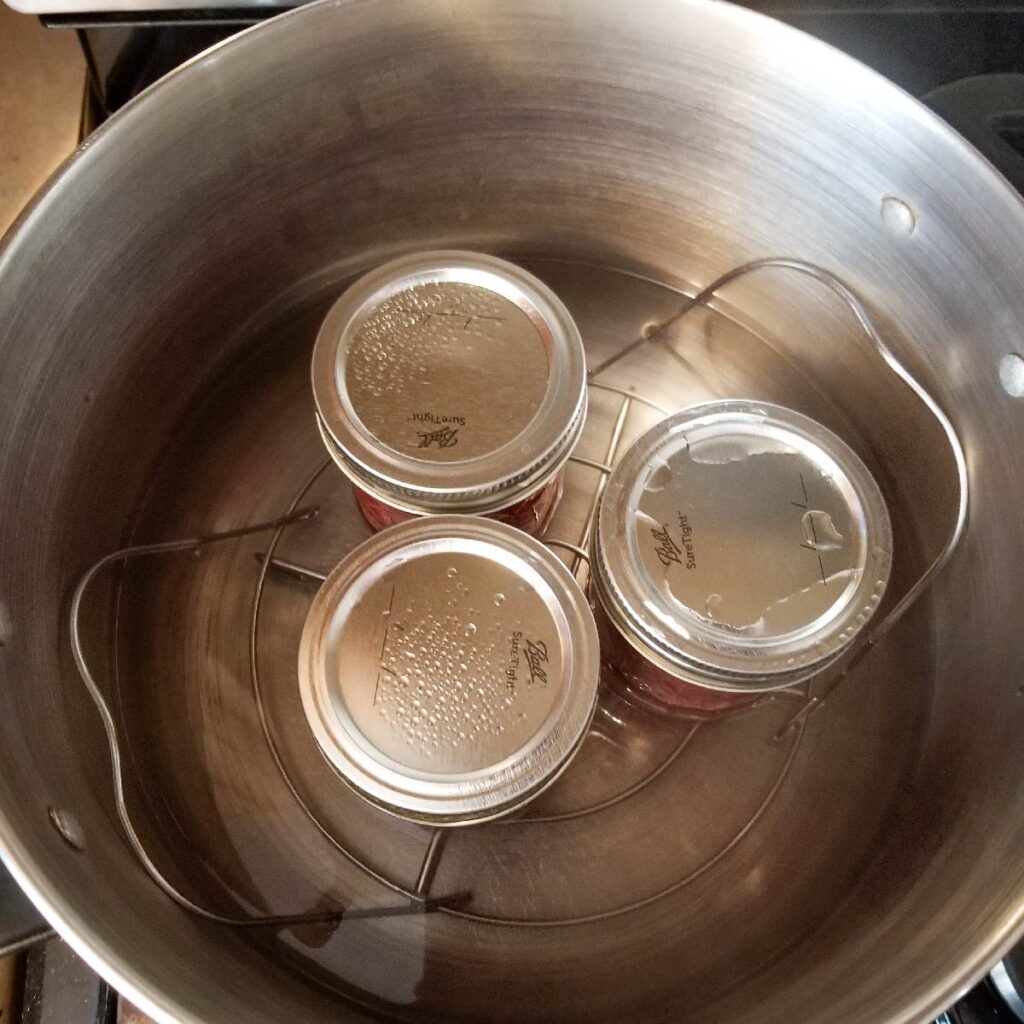
To show you that you can improvise, I canned my strawberry jam without my usual equipment. The usual equipment makes life easier when you do this often, but you can improvise here.
In the picture above you see one of my big stainless steel pots. For the rack I used my Instant Pot rack. Funny because it is the first time I have used this rack for anything! Seriously, it is.
You will use more water then this, I am just showing you the rack in the picture. It would be ideal if you used the same pot set up for the heating of the jars and the canning. This way the water is ready for you! You can fully submerge the jars to be heated and you will have to have your jam fully submerged after filling.
After filling each jar and placing the lid on it just tightened with your fingers, place them into the hot water. Once all jars are filled and placed in water, be sure the water covers the jars completely by at least an extra inch. Put the lid on your pot and bring to a boil. Once boiling, start a timer for 10 minutes. Keep the lid on and keep the water boiling. This is called a water bath so when you see it in other recipes, this is what they mean. Times will vary, like my bone broth gets 20 minutes.
Very Important
Once the 10 minutes is up, turn the burner off and remove the lid from the pot. Wait about 10 minutes before removing the jars. The jars will be hot and the temperature difference between them and your counter can cause them to break. Be sure to place them on a kitchen towel. Also be sure to set up your kitchen towel in a spot where the jars can rest for 24 hours without being disturbed.
You will hear a pop sound for each jar at some point while they are on the counter. It is them sealing. Do not check them for 24 hours tho. After 24 hours, try pressing on the center of lids. If they do not move, you are sealed and good to go. If it is popped and didn’t seal, put it in the fridge and use within 2-3 weeks.
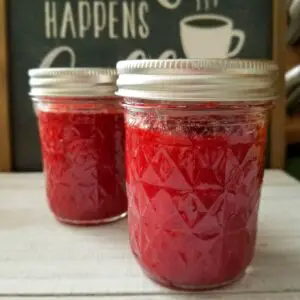
Homemade Strawberry Jam
Equipment
- Canning stock pot
- half pint jars
Ingredients
- 2 lbs strawberries stems removed
- 1½ cups sugar
- 3 tbsp lemon juice bottled, not fresh
Instructions
prepping the jars
- Before starting the jam, place the jars in a pot of water and heat them over medium heat so they are hot and ready for the jam. Keep them in the water until they are ready to be filled.
Making the jam
- Cut the stems off the strawberries and cut them in half. Put them in a large pot and mash them with a potato masher.
- Add the sugar and let sit for about 5 minutes. Turn the burner onto medium low. I mash them a little more now while they are heating up with the sugar on them. Cook for about 2 minutes on medium low.
- Increase the temperature to high and bring to a rolling boil. Once at a rolling boil, cook stirring very often for 4 minutes.
- Lower temperature back down to medium and cook for another 2 minutes.
- Using a ladle, pour the jam into each jar leaving a half inch of space on top. Clean the top of each jar with a clean cloth. Place the lids on and the rings to lock the lids on. Tighten with just your fingertips so you don't over tighten.
- If not canning, allow the jam to sit on a towel or potholder until it cools to room temperature. Place in the refrigerator and use within 2-3 weeks.
- If canning, their are canning instructions above in the post if you are new to it. You will give them a water bath for 10 minutes.


How many cups mashed strawberries is this?
I used 2 pounds of strawberries, but I didn’t measure how many cups of mashed strawberries it made. I am sorry.